


Last Updated on February 11, 2026 by maryamnawaz
Table of Contents
Introduction
One often-overlooked element plays a critical role in achieving a flawless and enduring paver installation: joint sand. This seemingly simple material is the unsung hero that holds your outdoor patio, walkway, or driveway together.
Whether you’re a DIY enthusiast or a seasoned landscaper, understanding why joint sand for pavers matters and how to apply it correctly can save you time, money, and hassle in the long run.
In this article, we’ll break down the different types of joint sand, highlight top-rated products, walk you through expert application tips, and share essential maintenance tricks to keep your pavers perfectly set for years to come.
| Product Name | Type of Joint Sand | Best For | Key Features | Coverage (per 50 lb) | Estimated Price |
| PolySweep Polymeric Sand | Polymeric | Driveways, patios, walkways | Natural binding agents, permeable, and safe for plants | 75–100 sq ft | $30–$35 |
| Dominators Sand | Polymeric | High-traffic areas | Rain-safe in 45 minutes, advanced binding agents | 60–80 sq ft | $35–$40 |
| Sakrete Paver Set | Polymeric | General residential use | Hardens like concrete, weed & insect resistant | 80–100 sq ft | $25–$30 |
| Techniseal SmartSand | Polymeric | Decorative or sloped installations | Fade-resistant, high bonding strength | 60–80 sq ft | $35–$45 |
| EnviroSAND | Organic polymer sand | Eco-friendly landscaping projects | Natural binding agents, permeable, safe for plants | 65–90 sq ft | $30–$38 |
What is Joint Sand, and Why is it Important?
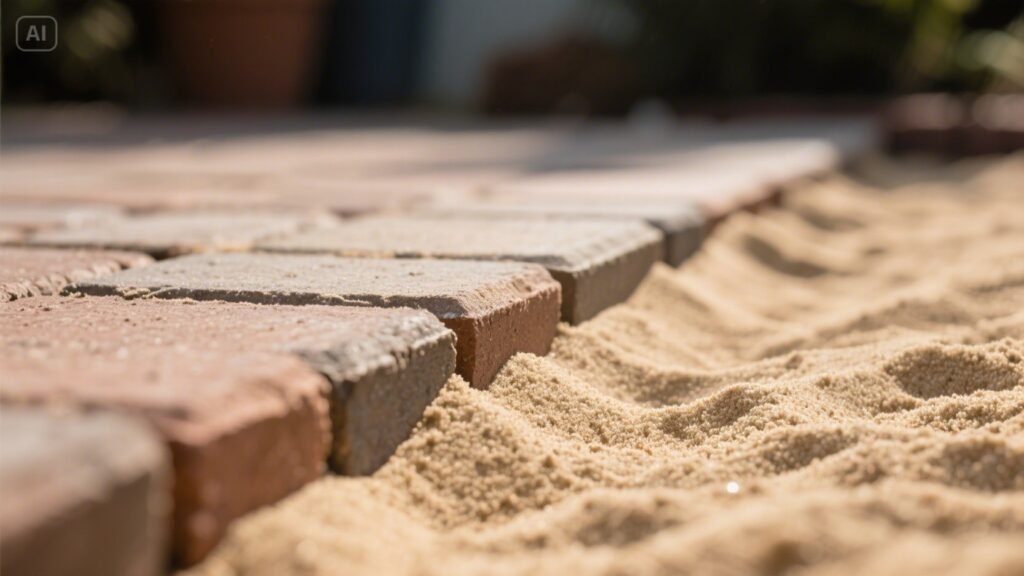
Joint sand is the fine material swept into the spaces between pavers. Its primary purpose is to lock the pavers together, prevent shifting, reduce weed growth, and deter insect infestations. Pavers can become uneven or unstable without proper joint sand, diminishing aesthetics and functionality.
Key Benefits of Joint Sand
- Enhances the structural integrity of paver installations
- Prevents weed growth and ant infestations
- Reduces water infiltration and erosion
- Offers a clean, finished look
Types of Joint Sand for Pavers
There are two main types of joint sand commonly used in paver projects:
1. Regular Joint Sand
Often referred to as “play sand” or masonry sand, this type is fine-grained and affordable but lacks bonding properties.
| Pros | Cons |
| Cheap and widely available | Easily washed out |
| Easy to install | It doesn’t harden or bond. |
2. Polymeric Sand
This type of joint sand contains fine grains mixed with polymer additives. When activated with water, it hardens to form a durable, flexible joint.
| Pros | Cons |
| Superior bonding and stability | More expensive than regular sand |
| Resists weed growth and ants | Requires precise application to avoid hazing |
| Long-lasting with minimal maintenance |
Top Products: Best Joint Sands on the Market
Here’s a concise comparison table of some of the top-rated joint sands available today:
| Product Name | Type | Best For | Key Features |
| Gator Maxx G2 | Polymeric | Driveways & high-traffic | High strength, no dust, haze-free |
| Dominator Sand | Polymeric | Patios & walkways | Easy to apply, color options available |
| Sakrete Paver Set | Polymeric | Residential applications | Strong bonding, erosion-resistant |
| Quikrete Joint Sand | Regular | Budget-friendly solutions | Affordable, basic stabilization |
Enhancing Aesthetic Appeal with Colored Joint Sand
While the primary function of joint sand is structural, selecting a colored polymeric sand can also elevate the visual appeal of your paver installation. Available in shades ranging from natural tan to charcoal, red, or even sandstone, colored joint sand allows you to complement or contrast your pavers, creating a polished and intentional look.
Using color-coordinated sand not only highlights the shape and pattern of your layout but also gives your patio, walkway, or driveway a professional, finished appearance, turning functional joints into a subtle design element that enhances overall landscaping aesthetics.
How to Apply Joint Sand: Step-by-Step
Step 1: Prep the Surface
Clean the surface of your pavers thoroughly. Using a pressure washer or stiff broom, remove any dirt, debris, or old joint material.
Step 2: Dry the Area
Ensure the pavers and surrounding areas are completely dry before applying sand, especially polymeric types, which require dry conditions before activation.
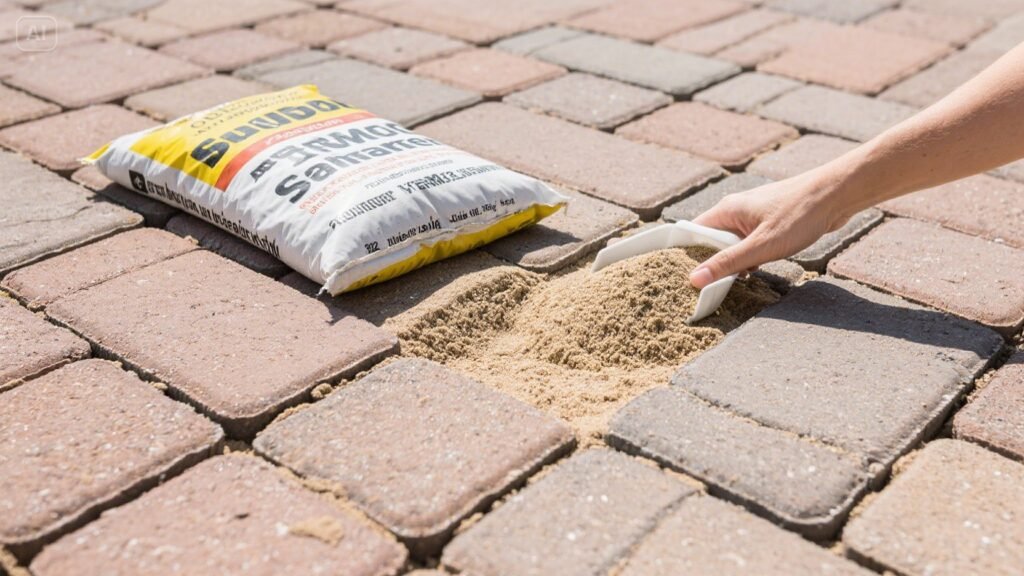
Step 3: Spread the Sand
Use a push broom to sweep the sand into the joints, working it back and forth until all gaps are filled.
Step 4: Compact the Pavers
Vibrating the pavers with a plate compactor or rubber mallet helps the sand settle deeper into the joints.
Step 5: Top-Off and Clean
Add more sand if needed. Sweep off any excess sand from the surface to avoid polymeric hazing.
Step 6: Activate with Water (Polymeric Sand Only)
Lightly mist the entire area to activate the bonding agents. Avoid over-watering, which can wash out the sand.
Maintenance Tricks for Perfectly Set Stones
1. Regular Cleaning
Regularly sweep away debris and dirt to maintain the appearance of your pavers and joint sand. A soft-bristle broom is ideal for this task.
2. Replenishing Joint Sand
Joint sand may wear away over time due to weather conditions or heavy foot traffic. Inspect your pavers annually and replenish the sand as needed to maintain stability and appearance.
3. Weed Control
To prevent weeds from breaking through the joints, consider using a weed killer or a natural alternative like vinegar. Regularly check for any signs of growth and address them promptly.
4. Sealing Pavers
Applying a sealant to your pavers can protect the surface from stains and enhance the color. Sealants also help keep joint sand in place, reducing the need for frequent replenishment.
5. Seasonal Maintenance
During winter months, check for ice accumulation in the joints. Use a plastic shovel to remove ice without damaging the pavers. In spring, inspect for any joint sand erosion and replenish as necessary.
Common Mistakes to Avoid
- Applying sand to wet pavers can cause clumping and improper bonding
- Not compacting after sand application — Leads to shallow fill and instability
- Over-watering polymeric sand — Can result in weak joints or surface hazing
- Ignoring manufacturer instructions — Always follow the specific guidelines on the sand product you choose
Final Thoughts
Joint sand is a crucial component of any paver installation. Whether you opt for traditional joint sand or advanced polymeric options, correct application and consistent maintenance will make a world of difference in the longevity and appearance of your hardscape.
Choosing the right product, following expert installation tips, and avoiding common mistakes will ensure your pavers remain beautifully set and structurally sound for years.
Apart from that, if you are interested to know about “The Homeowner’s Repair Checklist” then visit our “Home Improvement” category.
FAQs
Regular maintenance includes checking the joint sand annually and replenishing it as needed, especially after heavy rainfall or if you notice erosion.
Yes, using polymer-modified joint sand significantly reduces weed growth. Regularly inspecting for weeds and applying a weed killer can also help.
If your joint sand washes away, reapply it following proper installation techniques. For better resistance against erosion, consider using polymer-modified sand.
To enhance longevity, regularly clean your pavers, replenish joint sand, consider sealing the pavers, and perform seasonal maintenance to address any issues promptly.


