Last Updated on March 20, 2024 by Ali Hamza
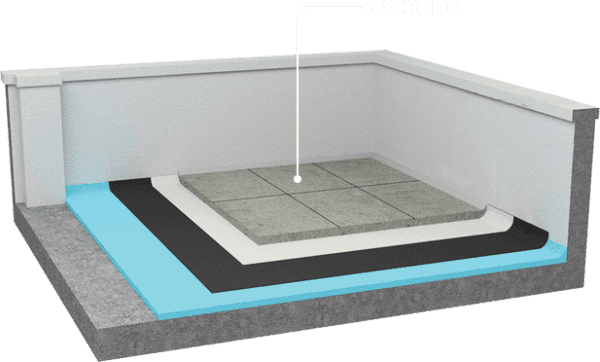
Screed is one of the most essential materials of the building process. It’s a crucial material laid on top of concrete to create a smooth and level surface beneath the final floor covering.
The screed can be used beneath many kinds of floor coverings, including tiles, vinyl, wood, carpets, and more.
Like any job in the building industry, preparation is vital. To lay your screed correctly, you’ll need to follow several essential steps to ensure your flooring gets the smooth, level finish it deserves.
Let’s take an in-depth look at the ultimate guide to laying screed, including the most important steps you’ll need to follow and the differences between the most notable types of screed, including liquid, bonded, and unbonded.
Table of Contents
Types of Screed
There are a few types of screed, and each one is made for a different purpose. However, the most common types of screed are:
Liquid Screed
Liquid screed, also called self-compacting screed or calcium sulphate screed, is the most popular type of screed, thanks to its quick drying times. It’s ideal for underfloor heating installations, and liquid screed in Bristol can be poured onsite at a rate of 2,000 square metres a day, making it one of the most effective building materials.
Floating Screed
This screed is usually installed at a 35mm depth, and it’s mainly used in buildings with underfloor heating. It can also be used when acoustic or thermal insulation is needed. A floating screed is installed on top of the insulation to increase buildings energy efficiency.
Bonded Screed
This screed is a mix that’s fully bonded to the substrate with a bonding agent. This screed is ideal for projects that require frequent heavy loading, like car parks.
Unbonded Screed
Unbonded screed is laid on top of a damp-proof membrane that’s positioned on top of concrete. This can help reduce dampness and shrinkage, and it’s ideal for use in conjunction with underfloor heating or cast-in pipes.
Underfloor Heating Screed
As the name suggests, this screed is laid on top of a buildings heating pipes rather than its insulation. This can avoid cold spots in the heating system to provide a more consistent output of heat.
Laying Floor Screed
To lay screed correctly, you’ll need to follow some crucial steps. Let’s take a look at the most critical steps you’ll need to follow when screeding a floor.
Remember: before you begin screeding, your insulation and underfloor heating will need to be put down first. If you have some solid DIY experience, screeding a floor is something you can do yourself; however, it’s not easy. You’ll need to pay close attention to detail and not rush the job. If you need some help, you can contact a liquid screed company in Newbury to oversee your project from start to finish.
1: Tools
You’ll need to gather up the best tools for the job. To screed a floor, you’ll need the following:
- A tape measure
- A shovel
- Spirit level
- Wheelbarrow
- Trowel
- Timber Battens (usually 100mm x 50mm)
- Float
- Protective Gear – Gloves and knee protection is crucial
2: Mix
Now you’ll need to prepare the mix. There’s a lot of debate about the correct mix ratios, and you’ll probably receive a different answer everywhere you go. The truth is, there’s no ideal ratio; you’ll have to figure out the sort of consistency that’s right for you. Whatever percentage you choose, use water sparingly when mixing to test the consistency as you go. Ultimately, the end consistency should be compressed into a ball and held together nicely without leaving wet clumps or residue.
3: Levels and Laying
To get a completely flat surface, you’ll need to follow some general guidance. Professionals tend to make their levels using a mix to make a frame. You should lay your timber battens down on a bed of mixture and make sure they stay laying flat with the spirit level. The screed can then be placed on top for a more even application.
When screeding, begin at the furthest points (i.e. away from the door), so you can work back towards it. You should ensure that the last section to be done is directly in front of the entrance to the room. Move your mix around with your trowel enough to cover the area you’re working on, and compact the mixture together as you go. When it’s in place, get your straight edge and start to move it back in a slightly circular motion to create a flat finish. Then, keep your straight edge on the first layer and repeat the above steps to add another section.
Once done, cover your screed with a sheet of material like polythene to hold in moisture and help it dry out evenly. Depending on the screed you’re using, drying times can vary from 24 hours to 7-10 days.
Read More: What is floor screed and why do you need it?


