


Last Updated on February 9, 2026 by maryamnawaz
Table of Contents
Introduction
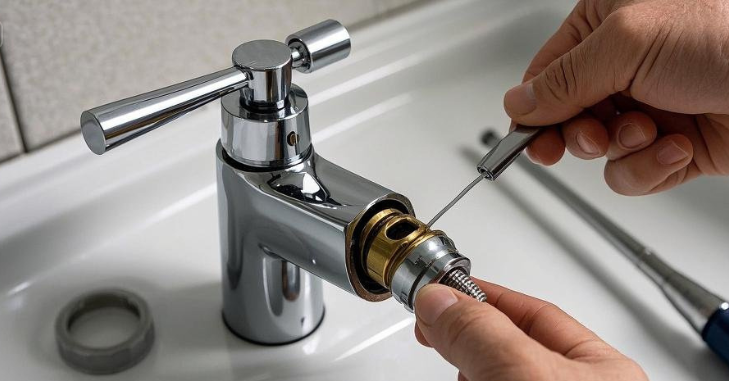
If you plan to replace your old or leaking faucet, properly removing a bathroom faucet is essential. Whether upgrading your sink or fixing a plumbing issue, removing a faucet can be straightforward with the right tools and approach. If you want to upgrade your bathroom or fix a leaky fixture, know how to remove a bathroom faucet? is essential for any DIY enthusiast.
Although this task may initially seem intimidating, with the right tools and a clear understanding of the process, you can easily tackle it yourself. Whether you’re replacing an outdated model or addressing plumbing issues, this guide will provide you with step-by-step instructions to safely and effectively remove your old faucet, setting the stage for a successful installation of a new one.
Get ready to enhance your bathroom with confidence! Removing a bathroom faucet may seem daunting, especially for beginners. However, you can do it like a pro with the right tools, techniques, and guidance.
| Step | Description | Tools Needed |
| 1. Gather Supplies | Collect essential tools and materials. | Adjustable wrench, pliers, screwdriver, bucket, towels, and plumber’s tape. |
| 2. Turn Off Water Supply | Shut off the water valves under the sink to prevent leaks. | Adjustable wrench. |
| 3. Drain Excess Water | Open the faucet to release any remaining water. | Bucket, towels. |
| 4. Disconnect Supply Lines | Use a wrench to detach hot and cold water lines. | Adjustable wrench pliers. |
| 5. Remove Mounting Nuts | Loosen and remove the nuts securing the faucet. | Basin wrench, screwdriver. |
| 6. Lift the Faucet from Sink | Carefully pull the faucet out from its position. | Hands (use caution). |
| 7. Clean the Sink Surface | Scrape off residue and old sealant for a smooth reinstall. | Sponge, cleaner, putty knife. |
| 8. Inspect Plumbing | Check for leaks or damages before installing a new faucet. | Flashlight, plumber’s tape. |
How to Remove a Bathroom Faucet?
Tools and Materials Needed
Before starting, gather the following tools and materials to make the process smoother:
- Adjustable wrench
- Basin wrench
- Bucket or towel (to catch excess water)
- Plumber’s tape
- Screwdriver (Phillips and flat-head)
- Plumber’s putty or sealant
- Penetrating oil (for rusted parts)
- Safety gloves
- Flashlight (for better visibility under the sink)
Having these tools ready will help you avoid interruptions during the removal process.
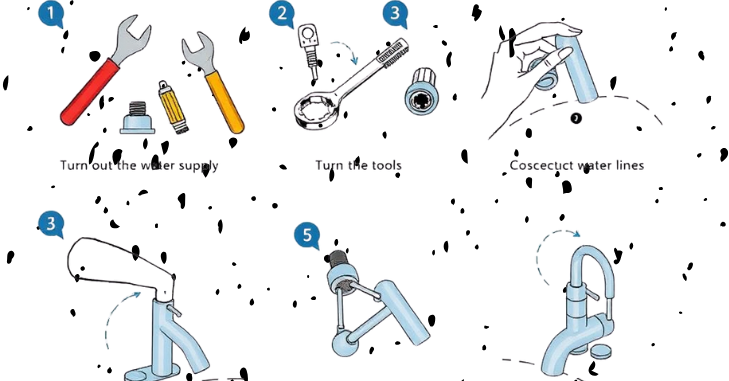
Step 1: Turn Off the Water Supply
Turning off the water supply is the first and most crucial action. Locate the shut-off valves beneath the sink and rotate them clockwise to halt the water flow. Without shut-off valves, you might have to cut off your home’s main water supply. Turn off the water, then open the faucet to drain extra water and relieve residual pressure.
Step 2: Disconnect the Water Supply Lines
Using an adjustable wrench, loosen the nuts connecting the water supply lines to the faucet. Be prepared for some water to drip, so place a bucket or towel underneath to catch any spills. If the connections are tight or corroded, applying penetrating oil can help loosen them.
Step 3: Remove the Drain Stopper (If Necessary)
Some faucets are connected to a drain stopper mechanism. If your faucet includes a lift rod, locate the metal clip under the sink, disconnect it from the drain rod, and pull the stopper out. This will allow you to work more freely.
Step 4: Loosen and Remove Mounting Nuts
The faucet is typically held in place by mounting nuts underneath the sink. Use a basin wrench to reach and loosen these nuts. Applying penetrating oil and waiting a few minutes may help if they are rusted or difficult to turn. Once loosened, delete the nuts.
Step 5: Detach the Faucet from the Sink
With the mounting nuts removed, gently lift the faucet from the sink. If it seems stuck due to an old plumber’s putty or sealant, use a putty knife to loosen it carefully. Be gentle to avoid damaging the sink surface.
Step 6: Clean the Sink Area
After removing the faucet, use a mild cleaner and a sponge to clean any old plumber’s putty, mineral buildup, or debris from the sink surface. A clean surface ensures a better seal for the new faucet installation.

Remove Escutcheon or Faucet Base Plate
Some bathroom faucets come with an escutcheon, a decorative base plate that covers extra sink holes or provides a finished look. Before lifting the faucet, it’s helpful to remove the escutcheon if your model has one. Typically, it is secured with screws or mounting nuts similar to the faucet itself.
Carefully unscrew or loosen it, then lift it away to prevent interference during faucet removal. Cleaning beneath the escutcheon is also recommended, as mineral deposits or grime often accumulate in these areas. This extra step ensures a cleaner workspace and helps guarantee a smooth installation of the new faucet.
Common Issues and Troubleshooting
Rusted or Stuck Nuts
If the mounting nuts are rusted or stuck:
- Apply penetrating oil and let it sit for at least 10 minutes.
- Use a wrench for extra leverage or tap lightly with a hammer to loosen them.
Leaky Water Supply Lines
If water continues to drip after shutting off the valves:
- Check if the shut-off valves are fully closed.
- If leakage persists, consider replacing the shut-off valves before installing a new faucet.
Safety Tips
- Always turn off the water supply before beginning any plumbing work.
- Wear gloves to protect your hands from sharp edges and grime.
- Use a flashlight to improve visibility under the sink.
- Consult a professional plumber to avoid damage if you encounter major plumbing issues.
Preparing for the New Faucet Installation
After successfully removing the old faucet, you’re ready to prepare for the new installation.
1. Choose the Right Faucet
Select a faucet that fits your sink and suits your style. Consider height, finish, and style (modern vs. traditional).
2. Read the Instructions
Before beginning the installation, read the manufacturer’s instructions for your new faucet. Each model may have unique steps.
3. Gather Installation Tools
Ensure you have all necessary tools ready for the new faucet installation. This includes the same tools used for removal, plus any additional items specified in the instructions.
Conclusion
Removing a bathroom faucet like a pro is achievable, even for beginners. By following this detailed guide, you can confidently navigate the process of faucet removal safely and efficiently. Remember to familiarize yourself with your faucet type, gather the necessary tools, and take time during each step.
With patience and practice, you’ll be ready to tackle this home improvement project and install a stunning new faucet that enhances your bathroom’s aesthetic. Whether updating for style or functionality, your efforts will lead to a successful outcome.
Apart from that if you want to know about “NEED TO HAVE BATHROOM ACCESSORIES FOR YOUR HOME” then please visit our “Home Improvement” Category.
FAQs
Yes, scrape off old sealant or residue using a putty knife and clean the area with a sponge or cleaner before installing a new faucet.
Yes! Most homeowners can remove a bathroom faucet with the right tools and instructions. However, if you encounter major plumbing issues, consult a plumber.
It usually takes 30 to 60 minutes, depending on the faucet type and condition of the mounting hardware.
Old supply lines should be replaced to prevent leaks and ensure compatibility with the new faucet.


