


Last Updated on July 6, 2023 by
Wanted to present the video to the client? Had it prepared for some high school project? Unable to access your video to put it on your feed? Well, it’s a common issue for files to be corrupted and a huge amount of people are unaware of repairit tools and just lose their files considering it to be damaged forever and rework from scratch. Wastage of time, right?
Table of Contents
Why your video is corrupted!
You must be wondering what’s causing your videos suddenly inoperable. There are particular
reasons behind the corrupted files and maybe affected by the following reasons:
- A virus has infected your Mac causing the video to be inaccessible.
- Read / Write process–If wrong information is written to a right file or right information is written to a wrong file, it may cause the data become obscure and corrupt the file.
- Storage Medium Damage–This is a ubiquitous mean of the damage as the hard drive / storage device renders parts of a file physically unreadable and cause an error to pop up instead.
- You’re saving a video and the computer loses power or crashes as you save the file. Bang! The file is damaged.
Now, You’re in the damaged world panicking about the lost file.
Repairit Right Now!
Your Video is 3 steps away to be repaired. Repairit tools allows you to repair your video without losing the original quality and makes your unplayable videos playable with just a few clicks
Ready to get your video back? Let’s Start
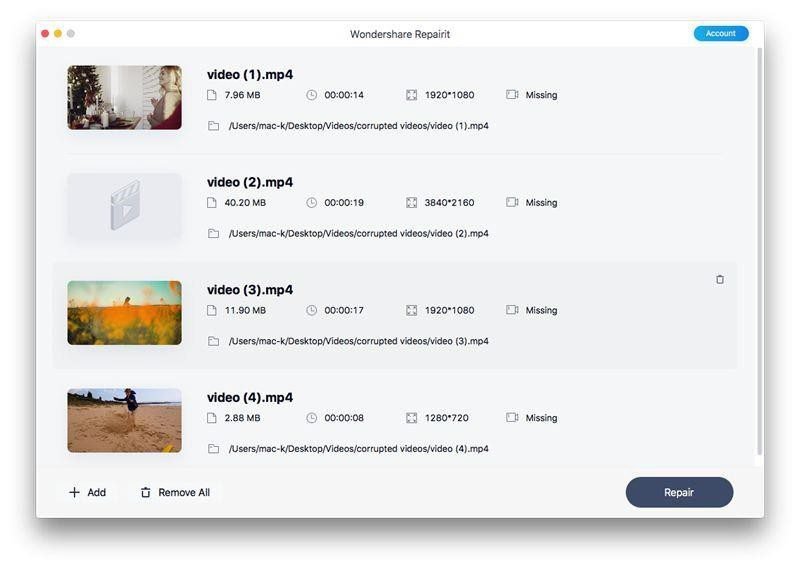
Step 1: Download the Software & Upload the Damaged Video
Download the repairit tools on your MacBook and Launch it. The tool will now display an ‘add’ button at the bottom. Click on the button, and add your damaged MOV, MP4, or M4V video from your desktop or simply drag it on the software. You can also add multiple videos.
Step 2: RepairIt
Click on the Repair button to start repairing your document. Wait until the repair process is done.
Step 3: Preview Your File
After the repairing process is completed, You will be allowed to preview your video in different formats through which you can assure the results.
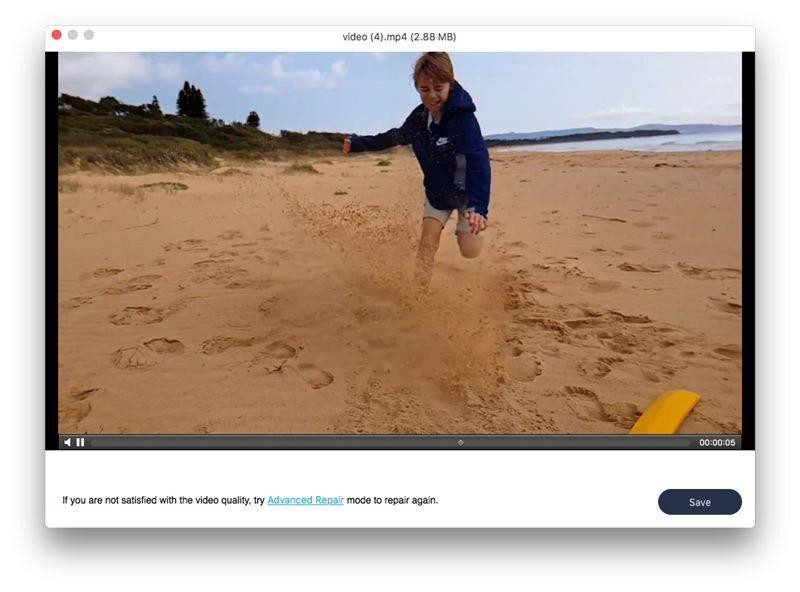
YOUR FILE IS READY!
Now, if you are not satisfied with the results or don’t get the desired one, you can avail the advanced feature.
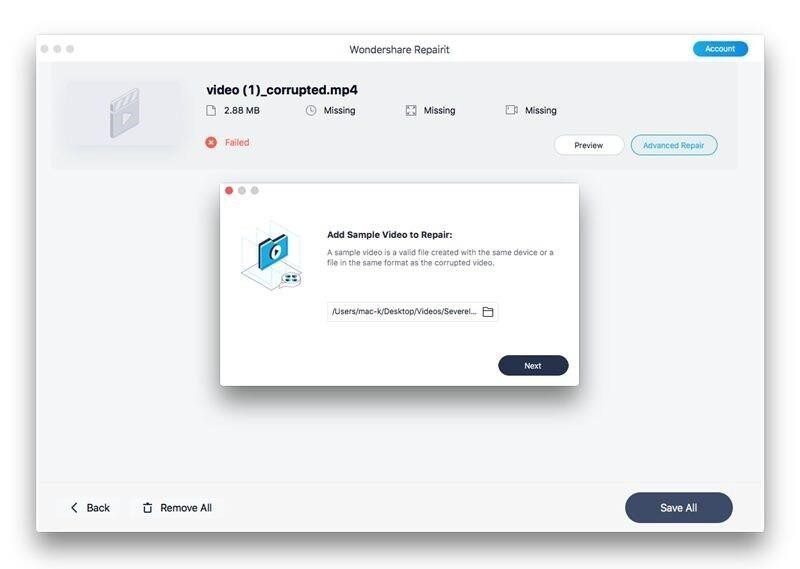
Advanced Video Repair:
Repairit gives you a feature of Advance Repair.
- Here you can entail a sample video and analyze the data for repairing. What needs to be made sure here is that your sample video and the damaged file(s) should be of the same format and located in the same directory.
- Now, you can choose your desired format (MOV, M4V, or MP4) and save them to any directory.
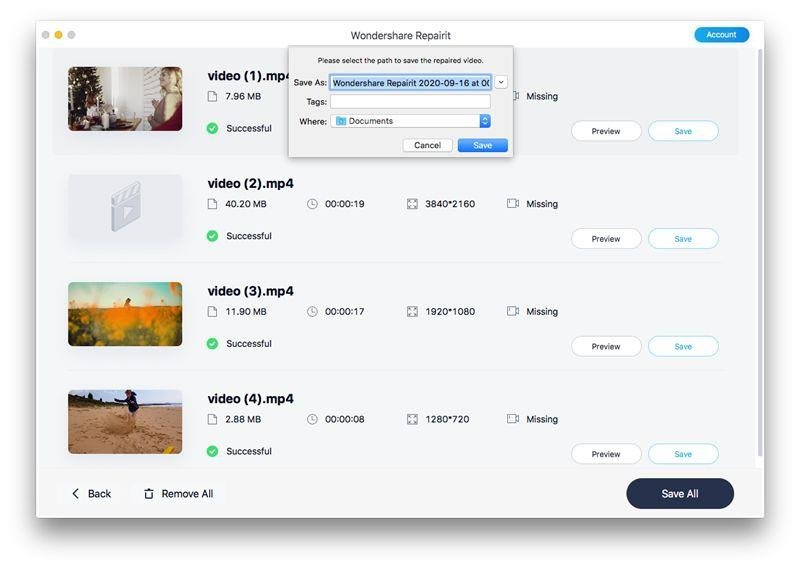
When you’ve successfully saved your file, de-stress yourself by seeing the pop up of confirmation message of your repaired file. This message will display a link to the location of your saved file.
How you can benefit from Repair it
- Batch Video Repairs
- Previews Video Captures During Playing
- Repairs HD & 8K Videos
- High Success Rate
If you don’t want to utilize any tool for your file repairing, you can leverage some regular ways on your Mac to repair the files…
1. Convert the video format through Streaming/Exporting Wizard
- Go to the ‘File’ menu
- Click on Transcode/Save & Click on Next
- Choose the video by clicking on the button at the right & Click on Next
- Set the Video and Audio Formats, codecs, bit rates as per your requirement & click on next
- Now you have to choose a location where you want your converted video to be saved & click on next and then finish after reviewing the summary of the conversion. Your file is good to go!
2. Change the File Extension
- To change the extension, click on the file and select ‘Get Info’ from the drop-down menu.
- Click on the Name & Extension tab and type in your required extension.
3. Repair from Time Machine Backup
- On your MacBook, go to the system preferences and open Time Machine and then show Time Machine in the menu bar
- Here, all the backed-up folders will be shown. Choose the folder containing your corrupted file and select it.
Future Prevention:
Now that you’ve repaired your successfully, you need to be protective for your upcoming files. There are several ways that can help you prevent your videos from damage.
- Make sure your device is virus free
- Having backup to your data is always a good approach. In this case, make sure you backup your content before editing. So that, just in case, you have to rework on it, you have the content already and backup can help you save the time. Working Smart of course!
- Before you create the video, check if your device has enough space for your storage.
- If you’re saving the file in an external drive, re-check if the drive is virus free and in good condition.
- Internet Connectivity issue is another big issue that can damage your file while saving.
- If you’re doubtful about your Mac device working, take precautions! So, if you’ve been putting your mac on hibernate or sleep since a long time, it’s better to shut it down in a proper way and turn on before making edits to the file because there are chances of the device to be crashed while running a heavy software or file.
- Make sure if you’re using the right software for editing. Some software illegally harms your data without you knowing about it. Check the license / verification of the software that you use before downloading them.
Conclusion:
Video File damage is temporary and you can repair it with hassle free Repairit tools. It is a highly recommended software that enables you to access multiple features and get your desired results in a couple of minutes without having to worry about the complex process.
Apart from that, if you are interested to know about The Best Free Video Converter for Mac then visit our Technology category.


